1. Feedback Form
This builds a feedback form that uses full stack: client side and server side code in python.
The references add an email capability but email has account quotas, so it will not be included below.
Working app at: https://pc-feedback-form.anvil.app
1.1. References
Youtube guide to create the app: https://www.youtube.com/watch?v=liZThmkIwys
Official Anvil guide with screenshots and animated gifs: https://anvil.works/learn/tutorials/feedback-form
1.2. Get started
Click: Blank App.
Choose: Material Design
1.3. Settings
Click on the cog icon to show the settings tab.
Enter an App name. Feedback_Form
Enter an App title. Feedback_Form
Enter an App description. Feedback_Form using server side code and a PGSQL database.
Get a feedback icon to upload such as: https://pics.freeicons.io/uploads/icons/png/121888721582994865-512.png
Click Change Image to upload an App logo.
Close the settings tab.
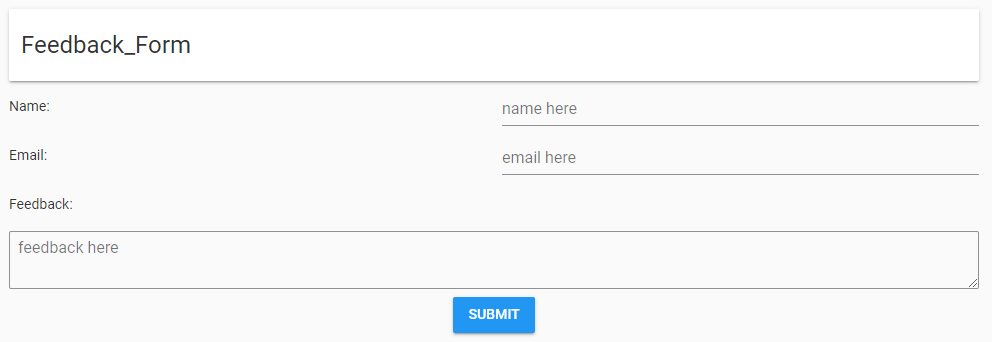
1.4. Build first part of interface
Build the following interface by dragging and dropping components and setting their properties.
Drag and drop the card component from the right toolbox onto Form1.
Drag and drop the label component onto card_1.
In the properties panel: text section, set the text to
Feedback Form.In the properties panel: appearance section, set the role to
Headline.Drag and drop three label components onto card_1 below the Feedback Form label, one below the other.

A horizontal blue line will indicate that you are in the right place to drop it.
In the properties panel: set their text to
Name:, Email: and Feedback:.Drag and drop a text box component onto card_1 to the right of the Name label.

In the properties panel: set the name to
name_box.In the properties panel: set the placeholder to
Name here.Drag and drop a text box component onto card_1 to the right of the Email label.
In the properties panel: set the name to
email_box.In the properties panel: set the placeholder to
Email here.Drag and drop a text area component onto card_1 below the Feedback label.
In the properties panel: set the name to
feedback_box.In the properties panel: set the placeholder to
Feedback here.Drag and drop a button component onto card_1 below the Feedback text area.
In the properties panel: set the text to
Submit.In the properties panel: set the name to
submit_button.In the properties panel: set the role to
primary-colour.
1.5. Build Data Table
In the left sidebar, click on the data icon.
Under default database, click
Add Table.
On the top right, name the table
feeedback.
The permissions are set to allow search and edit by server modules.

Click on the
+ New Column button.
Choose
Add Text Column.Change the column name from Column0 to
name.Click on the
+ button.Choose
Add Text Column.Change the column name from Column1 to
email.Click on the
+ button.Choose
Add Text Column.Change the column name from Column2 to
feedback.Click on the
+ button.Choose
Add date and Time Column.Change the column name from Column3 to
created_on.
1.6. Build the Server Code
In the left sidebar, click on the top app icon.
Under Server Code, click
Add Server Module.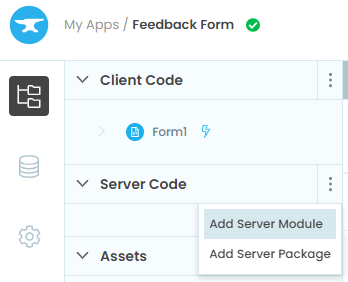
Enter the code to add a data table row.
Import the datetime module so the created_on value can be gotten.
@anvil.server.callable is a decorator. Placing it before the following definition modifes it so it is callable from the client form.add_feedback will pass in name, email, and feedback values from the form to add them to the data table.datetime.now() will get the date and time. e.g. 2022-04-01 20:30:11.532646import anvil.tables as tables
import anvil.tables.query as q
from anvil.tables import app_tables
import anvil.server
from datetime import datetime
@anvil.server.callable
def add_feedback(name, email, feedback):
app_tables.feedback.add_row(name=name,
email=email,
feedback=feedback,
created_on=datetime.now())
1.7. Build the Submit Code
Click on the Form1 tab.
Double click the Submit button. This adds default code for it.
The text from each feedback field needs to be stored in a variable.
The text property is used to get the text. e.g
name = self.name_box.textdef submit_button_click(self, **event_args):
name = self.name_box.text
email = self.email_box.text
feedback = self.feedback_box.text
Now use
anvil.server.call to call add_feedback in the server module, passing the 3 variables, name, email, feedback, to be added to the table.i.e,
anvil.server.call('add_feedback', name, email, feedback)A notification can be added is desired:
Notification("Feedback submitted.").show()def submit_button_click(self, **event_args):
name = self.name_box.text
email = self.email_box.text
feedback = self.feedback_box.text
anvil.server.call('add_feedback', name, email, feedback)
Notification("Feedback submitted.").show()
The feedback form then needs clearing.
Create a separate method:
clear_inputs(self, **event_args)Set the text property of each field to the empty string.
e.g.
self.name_box.text = ""def submit_button_click(self, **event_args):
name = self.name_box.text
email = self.email_box.text
feedback = self.feedback_box.text
anvil.server.call('add_feedback', name, email, feedback)
Notification("Feedback submitted.").show()
self.clear_inputs()
def clear_inputs(self, **event_args):
self.name_box.text = ""
self.email_box.text = ""
self.feedback_box.text = ""
1.8. Form Code
The complete form code is below.
from ._anvil_designer import Form1Template
from anvil import *
import anvil.server
import anvil.tables as tables
import anvil.tables.query as q
from anvil.tables import app_tables
class Form1(Form1Template):
def __init__(self, **properties):
# Set Form properties and Data Bindings.
self.init_components(**properties)
def submit_button_click(self, **event_args):
    name = self.name_box.text
    email = self.email_box.text
    feedback = self.feedback_box.text
anvil.server.call('add_feedback', name, email, feedback)
Notification("Feedback submitted.").show()
self.clear_inputs()
def clear_inputs(self, **event_args):
self.name_box.text = ""
self.email_box.text = ""
self.feedback_box.text = ""